An Ethernet cable is a very popular type of network cable which connects devices to the Internet or other networks using cables. They are used to connect devices located on local area networks (LANs), such as routers, PCs, and switches.
What you'll need to establish an Ethernet cable ?
- Ethernet Cable : Category 5e or CAT5e; Category 6 or CAT6 cabling, which has higher performance specifications, is also an option for high-speed home and business networks.
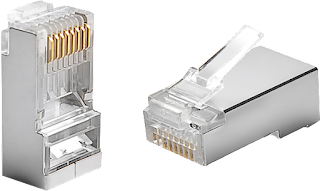
- RJ45 Crimpable Connectors :
- RJ-45 Crimping tool :
There are two types of Ethernet cables that can be made : - Straight through Ethernet cables are the standard cable used for almost all purposes. It's highly recommended you duplicate the color order as shown in the following picture. Note how the green pair is not side-by-side, like the other pairs. This configuration allows for longer wire runs.
- RJ45 Crimpable Connectors :
- RJ-45 Crimping tool :
There are two types of Ethernet cables that can be made :
- Straight through Ethernet cables are the standard cable used for almost all purposes. It's highly recommended you duplicate the color order as shown in the following picture. Note how the green pair is not side-by-side, like the other pairs. This configuration allows for longer wire runs.
- Put the eight wires between your fingers and arrange them according to the colors as shown in the following picture, then cut them straight using scissors.
- Carefully push all eight unstripped colored wires into the connector. Note the position of the blue plastic sleeve. Also note how the wires go all the way to the end.
- Crimping the cable: Carefully place the connector into the Ethernet crimper and cinch down on the handles tightly. The copper splicing tabs on the connector will pierce into each of the eight wires. There’s also a locking tab that holds the blue plastic sleeve in place for a tight compression fit. When you remove the cable from the crimper, that end is ready to use.


